Repotting Your Cactus: When and How to Do It
Cacti are known for being low-maintenance, but even these hardy plants need a new home from time to time. Repotting your cactus is essential to ensure healthy growth, improve drainage, and prevent root-bound issues. Knowing when and how to repot is key to keeping your cactus happy and thriving.
While repotting may seem unnecessary due to the cactus’s slow growth, it plays a vital role in its overall well-being. Over time, your cactus may outgrow its pot, become root-bound, or deplete the nutrients in its current soil. Knowing the right time to repot and how to do it properly can prevent issues like root rot and promote new growth. This guide will walk you through the essential steps of repotting your cactus to keep it flourishing for years to come. Whether you’re a seasoned plant parent or new to cacti, learning how to repot will ensure your prickly friend continues to grow strong and healthy.
When to Repot Your Cactus
The ideal time to repot your cactus is during its active growing season, which typically falls in the spring or early summer. This allows the plant to quickly recover from the stress of being repotted. On average, most cacti need to be repotted every 2-3 years, but smaller or younger cacti may need it more frequently. Here are some signs that your cactus is ready for repotting:
- The roots are growing out of the drainage holes.
- The cactus appears top-heavy or is outgrowing its pot.
- The soil dries out too quickly, or the plant looks unhealthy despite proper care.
If your cactus is still young and growing quickly, you may need to check annually whether it needs a bigger pot.
How to Repot Your Cactus
Choose the Right Pot
Select a new pot that is only slightly larger than the current one. A pot that is too large can cause the soil to retain excess moisture, leading to root rot. Make sure the pot has drainage holes to allow excess water to escape.Prepare the Soil
Cacti require well-draining soil to prevent waterlogged roots. Use a commercial cactus mix, or create your own by combining potting soil with sand or perlite. This will mimic the cactus’s natural desert environment, allowing it to thrive.Remove the Cactus Safely
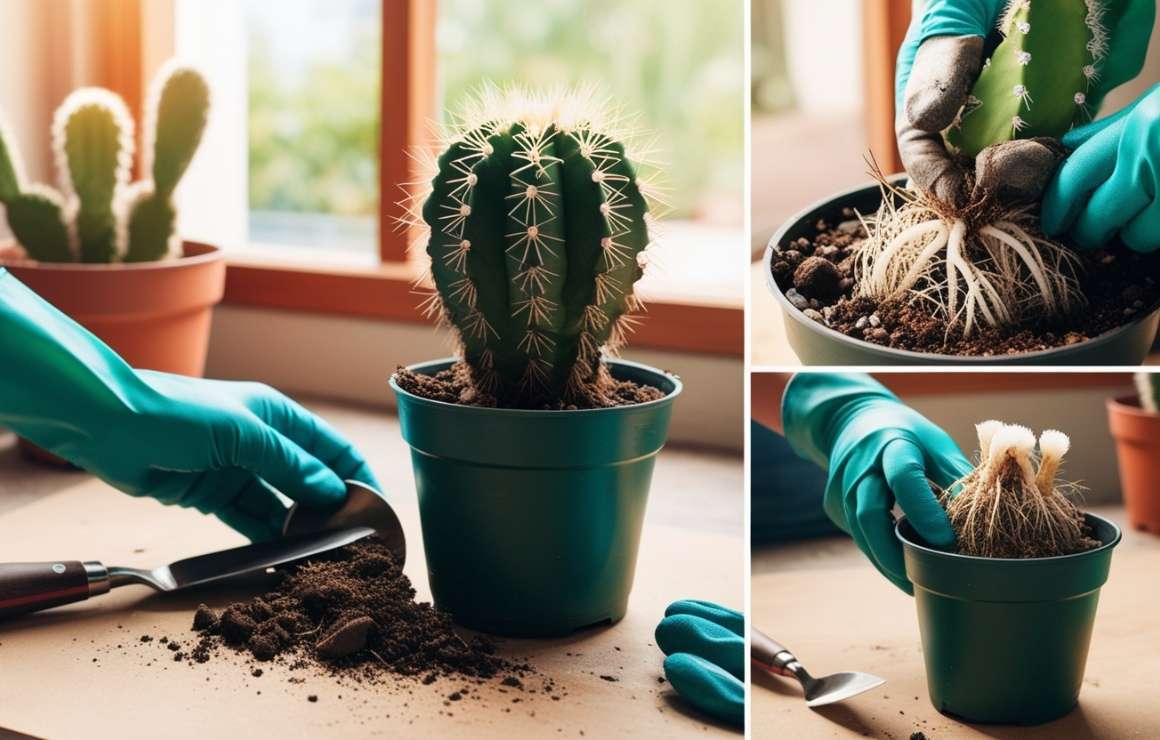
Wear thick gloves or use folded newspaper to gently handle the cactus, avoiding direct contact with the spines. Carefully loosen the soil around the plant by tapping the sides of the pot, then gently pull the cactus out. If the cactus is stuck, gently loosen the root ball with a tool or your fingers.Trim the Roots
If the roots are circling around the bottom of the plant, it’s a sign the cactus is root-bound. Trim any overly long or damaged roots with clean scissors or pruning shears. This encourages new root growth and allows the plant to better absorb water and nutrients.Repot the Cactus
Place the cactus in its new pot, centering it over the fresh soil. Add more soil around the plant, ensuring the base of the cactus sits just above the soil line. Press the soil down lightly to stabilize the cactus, but don’t pack it too tightly as this can reduce drainage.Water Sparingly
After repotting, wait about a week before watering to allow the roots to adjust and heal. When you do water, do so lightly at first, then return to your regular cactus watering schedule, allowing the soil to dry out completely between watering.
Aftercare Tips
Once your cactus has been repotted, give it time to acclimate to its new environment. Keep it in a spot with bright, indirect sunlight and avoid overwatering. Be patient, as your cactus may take some time to fully recover from the repotting process, but with proper care, it will soon resume healthy growth.
Repotting your cactus may seem like a daunting task, but with the right tools and knowledge, it’s an easy way to ensure your plant remains vibrant and healthy for years to come.


